
Generating and Exporting the Journal Report with Customer and Vendor Details from QuickBooks Online
Responsibilities
-
Finance Team: Responsible for running and validating the Journal report, ensuring all required columns are present, and exporting the data.
-
Light Implementation Team: Responsible for reviewing the exported data and confirming readiness for import.
Step 1: Log in to QuickBooks Online
-
Navigate to your QuickBooks Online company URL.
-
Enter your username and password, then click Sign In.
Step 2: Access the Journal Report
-
From the left-hand navigation menu, click Reports.
-
In the search bar, type “Journal” and select Journal Report from the dropdown.
-
Adjust the Report Period (From – To) to include the required timeframe.
-
Click Run Report.
📸 Screenshot Example: Navigating to the Journal Report
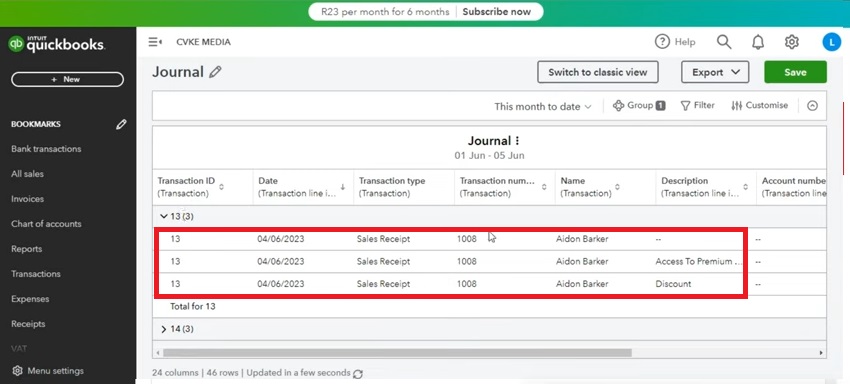
Step 3: Customize the Report to Add Customer and Vendor Columns
-
Click Customize (upper right-hand corner).
-
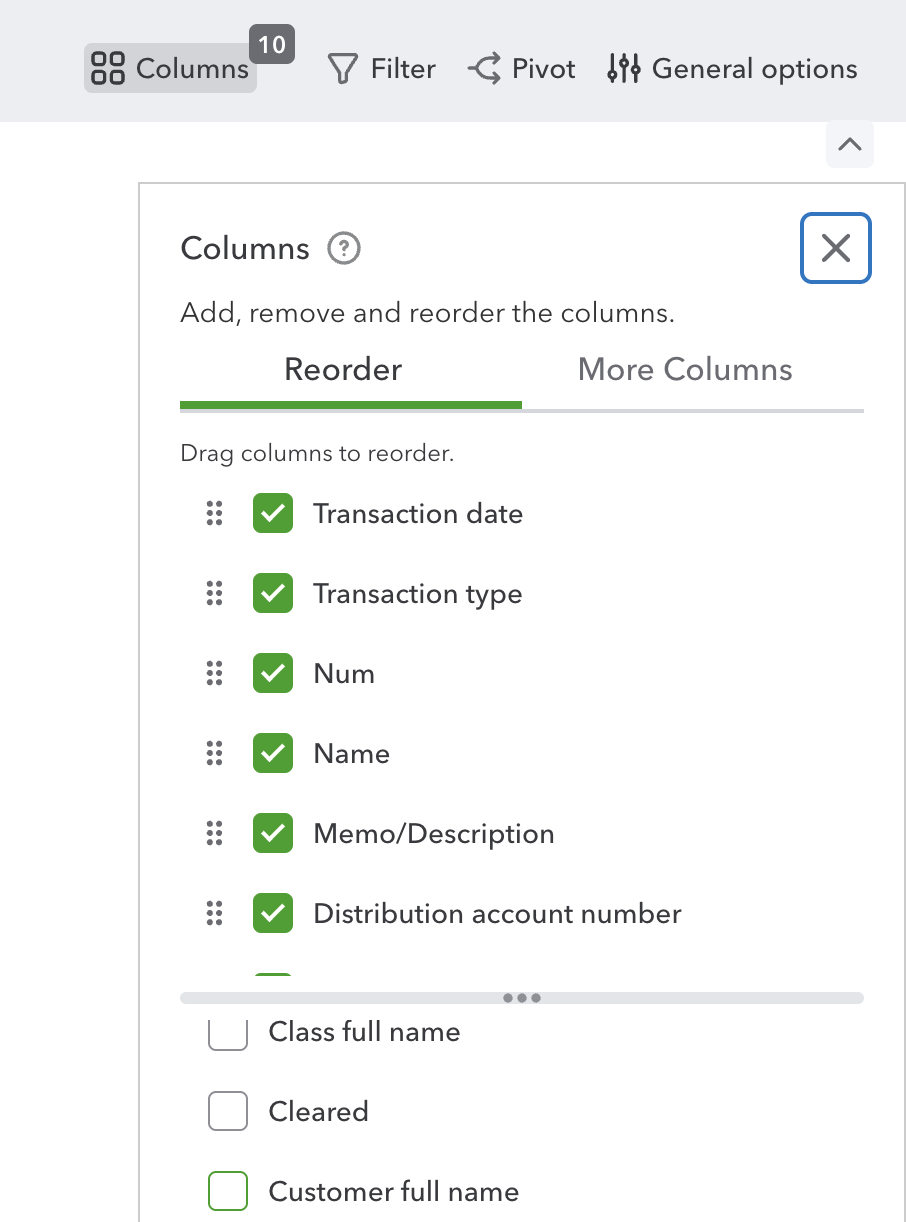
Expand the Rows/Columns section.
-
Under Change Columns, check the boxes for:
-
Customer
-
Vendor
-
(Optional: Name or Source Name if available)
-
-
Click Run Report to refresh the view.
📸 Screenshot Example: Customising Columns in the Report
-
If “Customer” or “Vendor” columns are unavailable, QuickBooks Online may restrict visibility of those fields for certain journal entry types.
Step 4: Export the Report
-
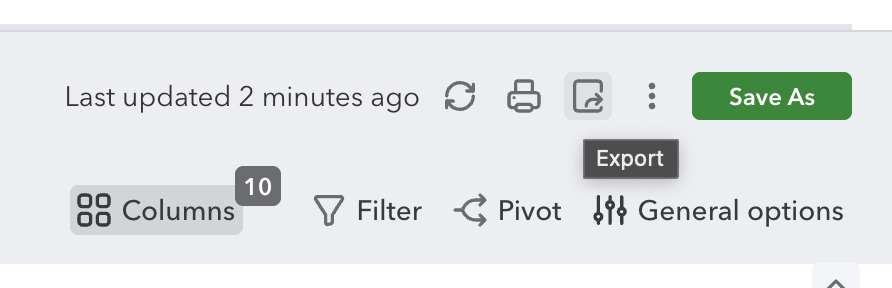
Once the report displays the desired columns, click the Export icon (downward arrow) at the top right.
-
Select Export to Excel (.xlsx)
-
Save the file with a clear name, e.g.,
Journal_Report_EntityName_2025Q1.xlsx.
📸 Screenshot Example: Exporting the Report
Step 5: Validate the Exported File
-
Open the exported file in Excel.
-
Confirm that all columns (Date, Account, Debit, Credit, Customer, Vendor, Memo, Journal No.) are present and correctly populated.
Expected Output
-
An exported Journal report containing all journal transactions for the defined period.
-
Columns for Customer and Vendor (where supported).
-
File saved and ready for next steps.
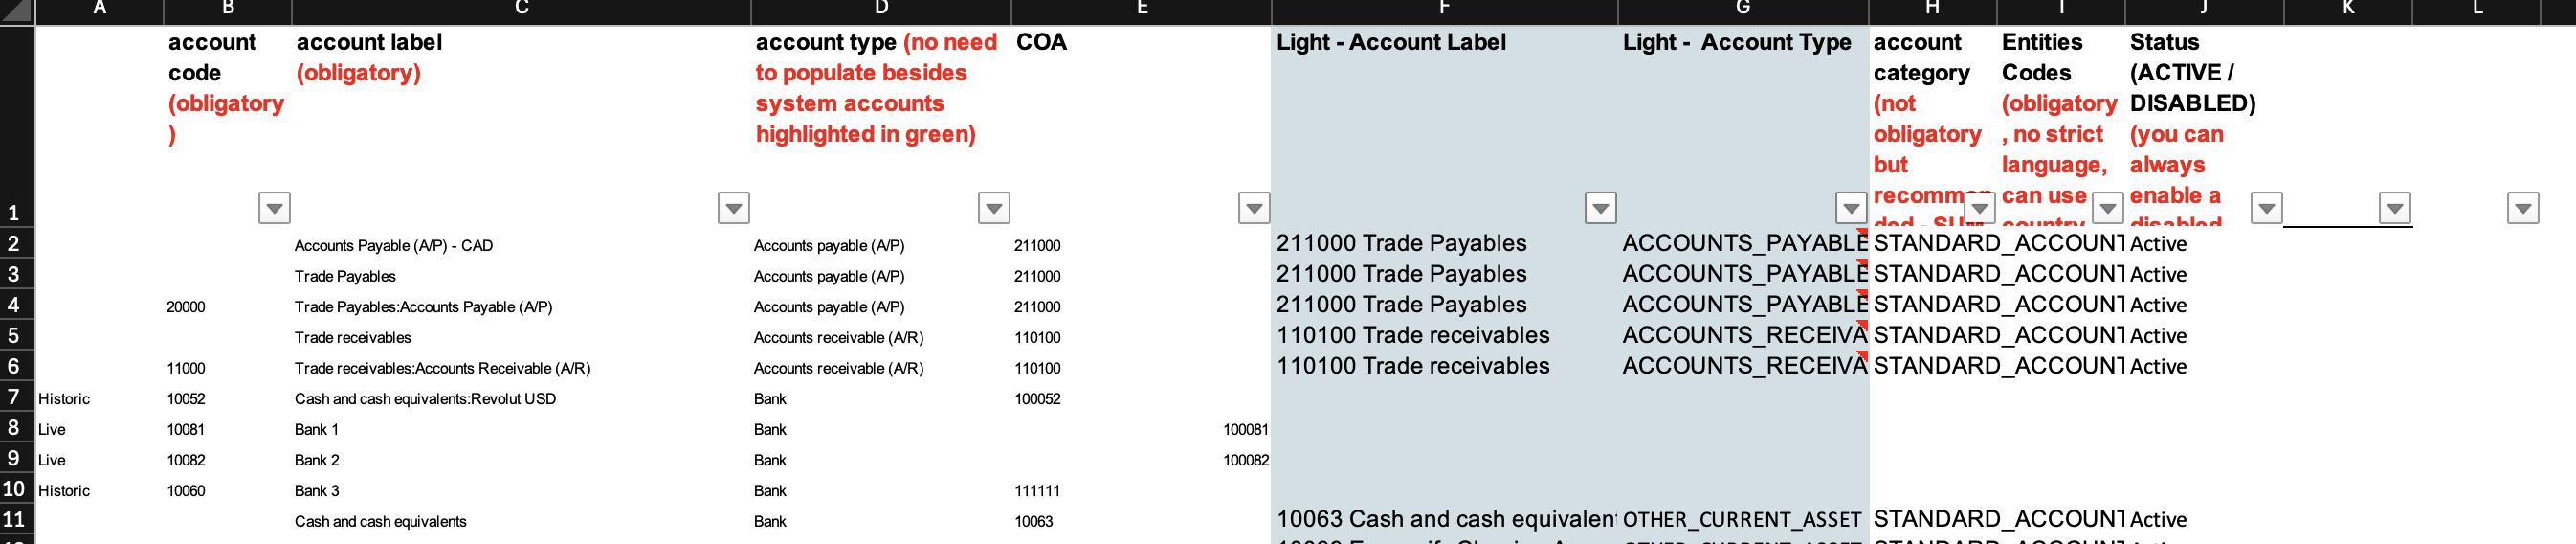
Step 6 : Prepare Master and Mapping Files
Once the data has been exported, complete the following steps:
-
Create a Master Chart of Accounts (COA) file from Light.
-
Prepare a mapping file for each entity that links the QuickBooks (QB) accounts to the corresponding Light accounts.
These files will be used to compile a comprehensive dataset containing all journal data along with the necessary account mappings required for the data upload process.
Verification of Chart of Accounts (CoA) Mapping
Ensure that the file contains a complete mapping of the old Chart of Accounts (CoA) to the new Light CoA.
Confirm that all accounts from QuickBooks Online (QBO) are included in this list.
Incomplete mappings may result in errors or missing data during the subsequent upload or migration steps.
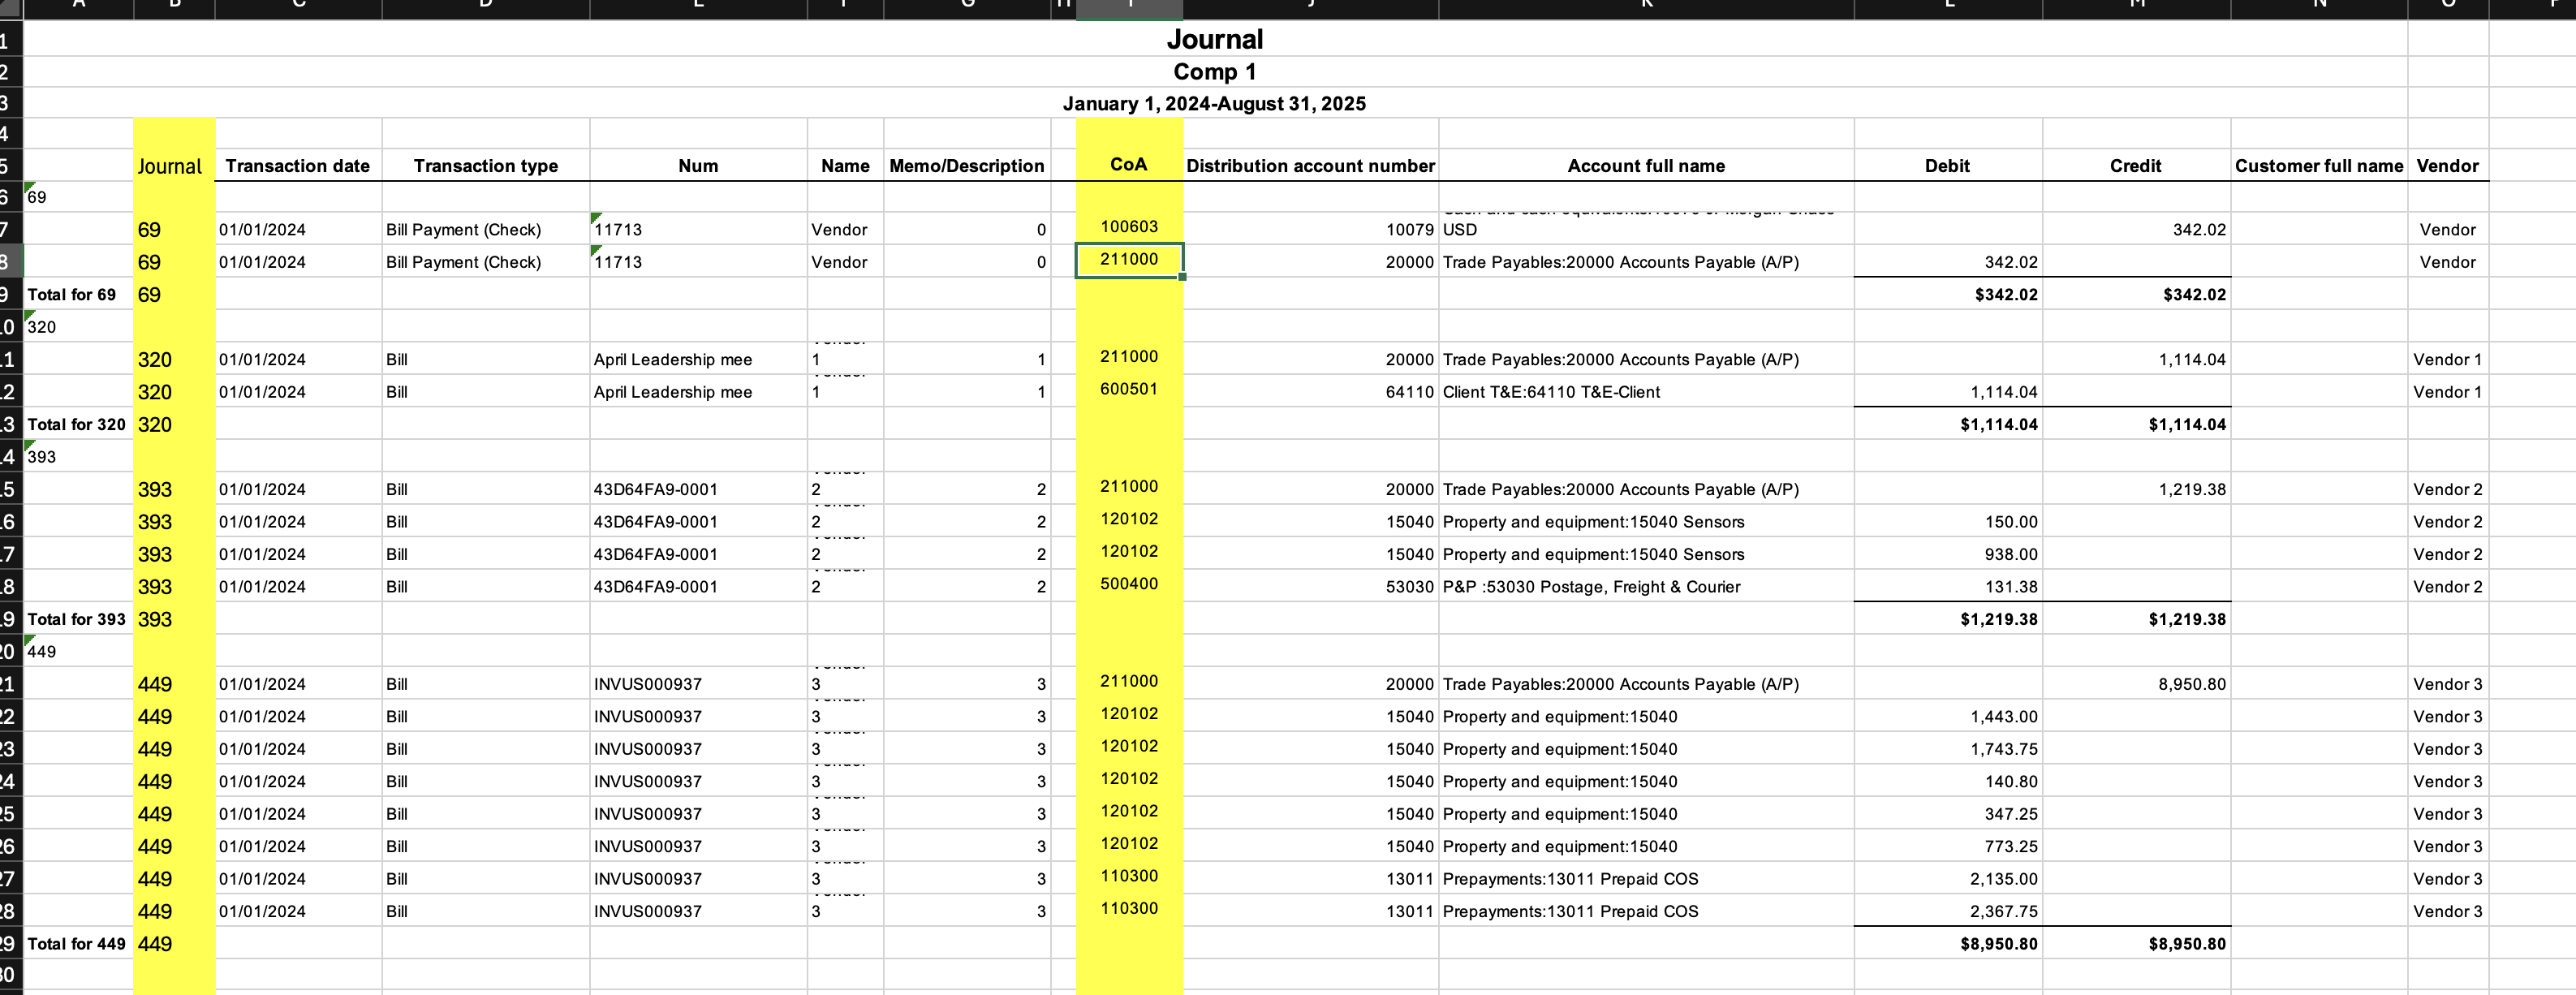
Step 7 : Prepare Journal Data for Light Review
1. Journal ID Formula
Objective: Ensure that the Journal ID appears on every transaction line.
-
In the designated “Journal” column, enter the following formula:
=IF(ISNUMBER(SEARCH("total", A6)), "", IF(A6="", B6, A6)) -
Explanation:
-
This formula ensures that each transaction line contains the appropriate Journal ID.
-
It omits the Journal ID from “Total” rows and fills any blank Journal ID cells with the corresponding value from the previous line.
-
-
Verify that every transaction line (excluding total lines) now includes a valid Journal ID.
2. Chart of Accounts (CoA) Mapping Formula
Objective: Confirm that the new Light CoA codes are correctly mapped to the old CoA codes.
-
In the “Light CoA” column, create a VLOOKUP formula referencing the CoA mapping tab.
Example:=VLOOKUP([Old CoA Cell], [Mapping Range], [Column Number], FALSE)
-
Explanation:
-
This lookup links each old CoA code to its corresponding new Light CoA code based on the mapping table.
-
Ensure that the mapping table (old-to-new CoA) is complete and up to date before applying this formula.
-
-
Review the column to confirm that all accounts have been successfully mapped and that no cells return errors (e.g., #N/A).
Step 7: Output / Deliverables
-
A transaction file with complete Journal IDs on every line.
-
Accurate mapping of all old CoA codes to the new Light CoA codes.
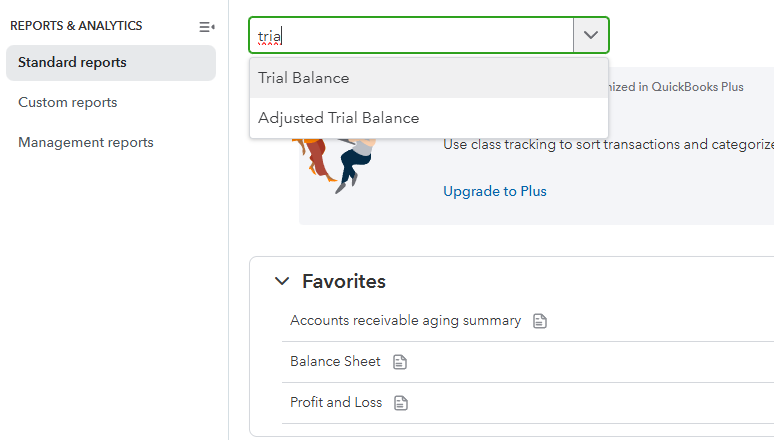
Step 8: Add opening balance posting :
Objective: The journals retrieved in the previous steps cover the movements for the full year (e.g., Jan 1st – Dec 31st). However, they do not include the starting financial position. You must manually add an opening balance entry representing the state of the accounts as of the very last day of the previous year.
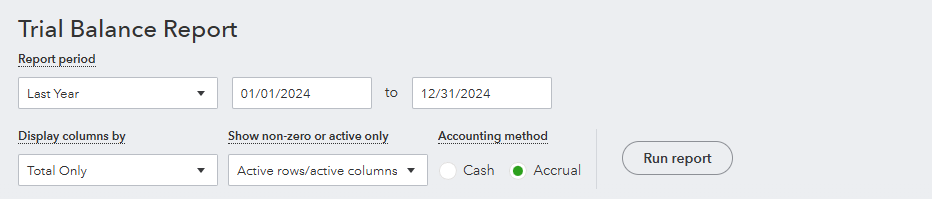
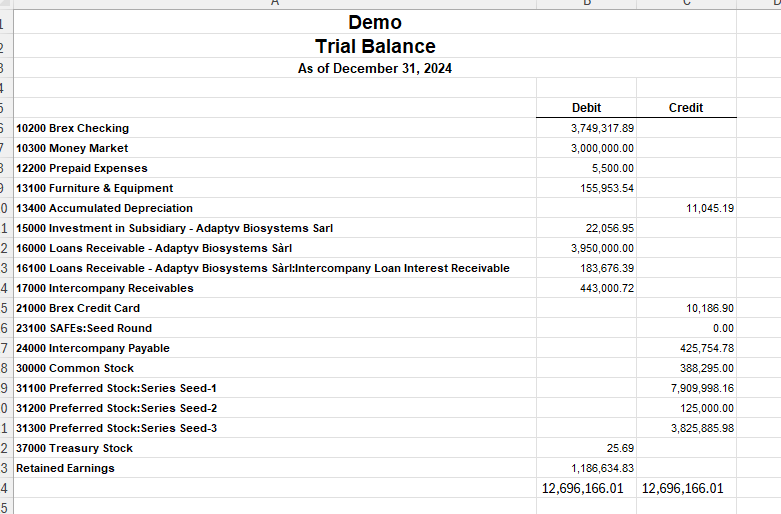
1. Extract the Opening Position (Prior Year Ending Trial Balance)
-
Go to Reports > Standard > Trial Balance.
-
Set the Report Period to the last day of the prior year (the day before your migration data starts).
-
Example: If the journals starts January 1st, 2025, you must run this Trial Balance as of December 31st, 2024.
-
-
Click Run Report.
-
Click the Export icon and select Export to Excel.
2. Perform the "Manual Close" in Excel
-
Note: QuickBooks does not "hard close" the year or post a closing journal entry. You must simulate this closure in your opening entry to ensure to start with the correct Equity.
-
Open the exported Trial Balance Excel file.
-
Calculate Net Income: Sum the net value (Debits minus Credits) of all Income and Expense (P&L) accounts.
-
Adjust Retained Earnings: Add this calculated Net Income figure to the existing Retained Earnings balance.
-
Remove P&L Accounts: Delete all Income and Expense rows from the file. You should now be left with only Balance Sheet accounts (Assets, Liabilities, and Equity), where Assets = Liabilities + Equity.
3. Format and Add to Master File
-
Copy these Balance Sheet lines into your main migration file.
-
Assign them a unique Journal ID (e.g., OPENBAL-2025 or OB-01).
-
Set the date as the first day of the year (e.g., 01/01/2025.
-
Critical Check: Ensure the total Debits equal total Credits for this entry before saving.
Step 9 : Confirmation of Journal data after additional fields added
-
Review the Exported File
-
Open the exported mapping file for each entity.
-
Check for any “N/A” values in the transaction lines.
-
-
Assess Mapping Completeness
-
If no “N/A” values are present:
-
Save the file.
-
Share the final version with Light for migration.
-
-
If “N/A” values are present:
-
This indicates that the mapping file is incomplete and some legacy accounts (old accounts not yet mapped to Light) have not been created.
-
-
-
Resolve Incomplete Mappings
-
Create the missing legacy accounts in Light.
-
Re-run the mapping process to ensure all transactions are correctly linked.
-
After the data upload is complete, disable these legacy accounts to prevent future postings.
-
-
Repeat for Each Entity
-
Perform the same validation and correction process for all remaining entities within QuickBooks (QB).
-
-
Submit to Light
-
Once all entities have been validated and updated, share the completed files with Light to initiate the next phase of the data migration.
-